When it comes to watching a solar eclipse, it is very important to have a pair of solar eclipse glasses to make the moment safe and enjoyable. However, these glasses can be a little expensive and they can be quite hard to find. Fortunately, you can always make your own solar eclipse glasses using the most basic materials you have in your home. If you want to make your solar viewing experience safer, then read on as we are going to show you how to make solar eclipse glasses. Whether you’re having a difficult time looking for solar glasses or you can’t afford to purchase one, consider following the steps provided below to save money and time.
Step 1: Gather your materials
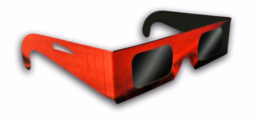
The first thing you should do is to collect your materials. You will need to have a pen, scissors, solar filter, a huge piece of cardstock, a template for the glasses, and a roll of blue painter’s tape. You can save a lot of time and effort if you have a pair of 3D glasses because you can simply skip the template. If not, don’t get troubled because you can do it yourself.
Step 2: Prepare the frames
If you don’t have frames and you are going to start from the scratch, you can begin by laying out cardstock on an even surface. Next, go ahead and place the template of the solar eclipse glasses on top of the cardstock. Once done, carefully draw the outline of the template and use your scissors to easily cut out the frames. You will need to have two handles for your ears and a single rectangular piece of cardstock with cutouts for both your eyes and nose. If you are using a pair of recycled 3D glasses, just remove the lenses and you are ready for the next step.
Step 3: Apply the solar filter lenses
Once you have your frames ready, the next step is to apply the lenses. All you need to do is to simply measure and cut the film. Make sure that the solar filter lenses cover the frames completely before you cut it. In addition, be careful and try not to scratch or poke the film because any damage or deformity could affect its protective quality. The process should be done within just a few minutes. Now that the lenses are in place, use the roll of blue painter’s tape to secure the film to your frames. You also want to add some tape on the two separate handles if you are creating your own solar glasses out of cardstock.
Step 4: Test the glasses
It’s crucial to test the glasses before you use it on the actual eclipse to avoid any complications. Don’t hesitate to go for a test run immediately once you are done making your own glasses. To determine if your glasses are safe, lock yourself into a dark place and wear your glasses. Next, have someone shine a flashlight directly at you. You have a leak if any bright light comes through your glasses.
Well, there you have it! Creating your own solar eclipse glasses is not as hard as you think. With the steps above, you should be able to make your own glasses without spending too much time, effort, and money.